Work/Motorsport // Club racing

Race subframe in.
Everything else needed a home.

This is the tail bracket set I designed and built for my ASRA club race R1 on a Moto Holders race subframe. A tail extension, a rectifier bracket and an ECU tray. Modeled in Inventor, test fit with printed parts, then cut, formed and bolted on the bike.

Bike
Yamaha R1, ASRA club race bike
Frame
Moto Holders aluminum race subframe, 2020+ R1 mounting
Bodywork
Carbonin race tail
Parts
Tail extension, rectifier bracket, ECU tray
Tools
Autodesk Inventor, sheet metal, 3D printing
Deliverables
IPT, IDW, DXF, STEP, print files
Case study

Why the brackets exist

The challenge

A race subframe saves weight and is cheap to fix after a crash. It also shows up bare. On my R1 the Moto Holders frame left the Carbonin tail, the seat bracket, the rectifier and the ECU without a home, and everything had to come apart quickly between sessions.

What I did

I modeled the frame area and the bodywork interfaces in Inventor, then designed three parts around them. The tail extension and rectifier bracket are aluminum sheet with drawings and flat patterns. The ECU tray is printed and uses the frame's welded bosses for location. Tight spots got a printed fit check before any metal was cut.

The result

Every part bolts on with no welding to the frame. The tail and seat bracket mount through rivet nuts, the rectifier sits outside the side plate in clean air, and the ECU drops into its tray with two screws.

The parts

Three parts I designed and made

Tail extension on the bike
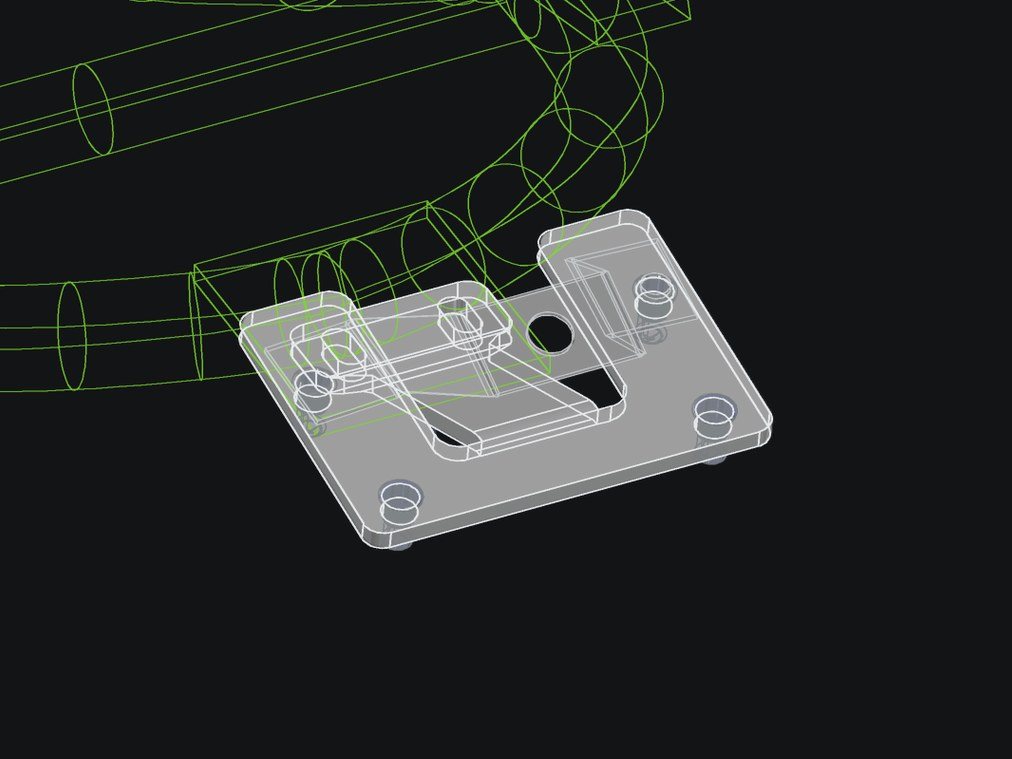
Tail extension render from the production CAD
1

Tail extension

RevA

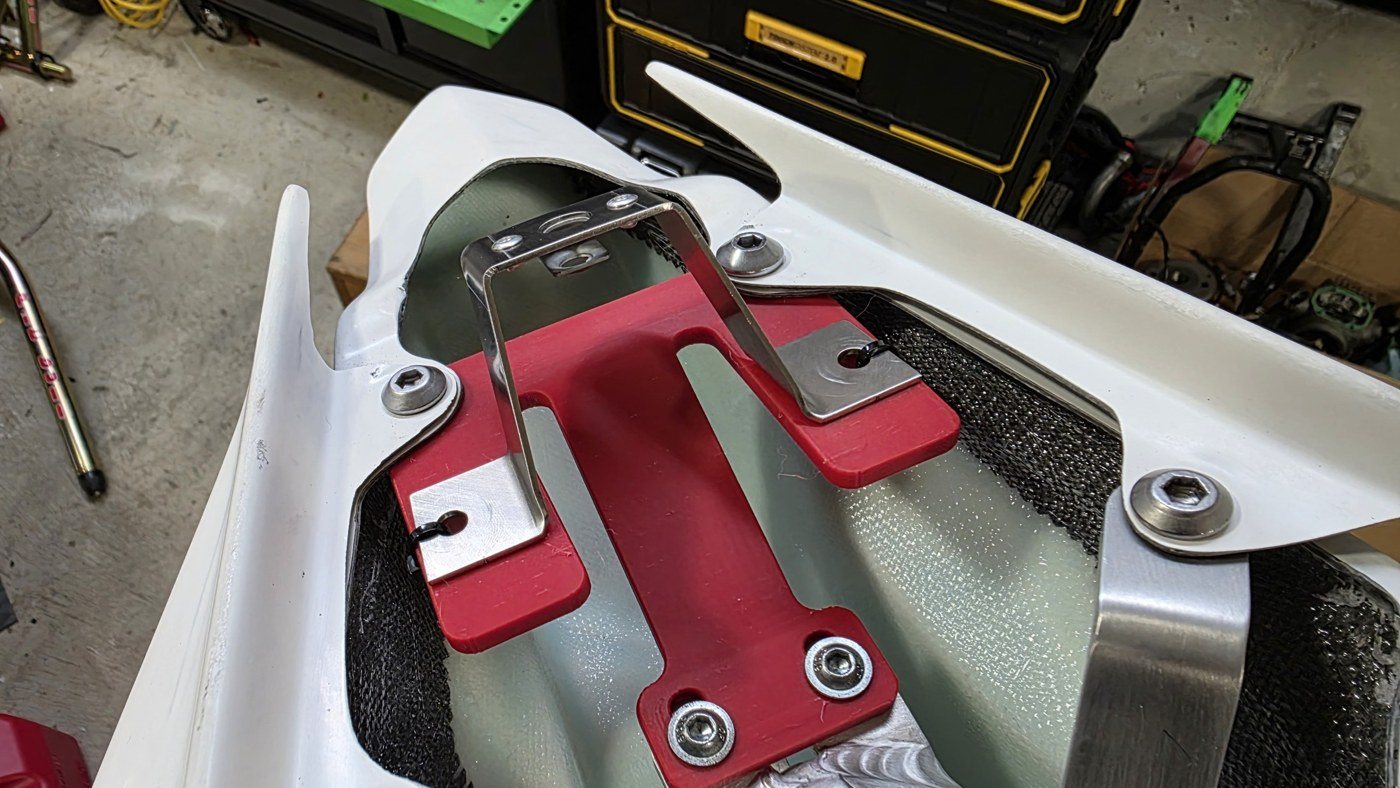
Bolts to the rear node of the subframe and carries the seat bracket. Four rivet nuts take the bodywork fasteners, so the tail comes off with hand tools.

  • ✓Aluminum sheet, 0.125 in
  • ✓Cut from a DXF flat pattern and formed
  • ✓4x rivet nuts, McMaster 95105A179
View the drawing (PDF) →
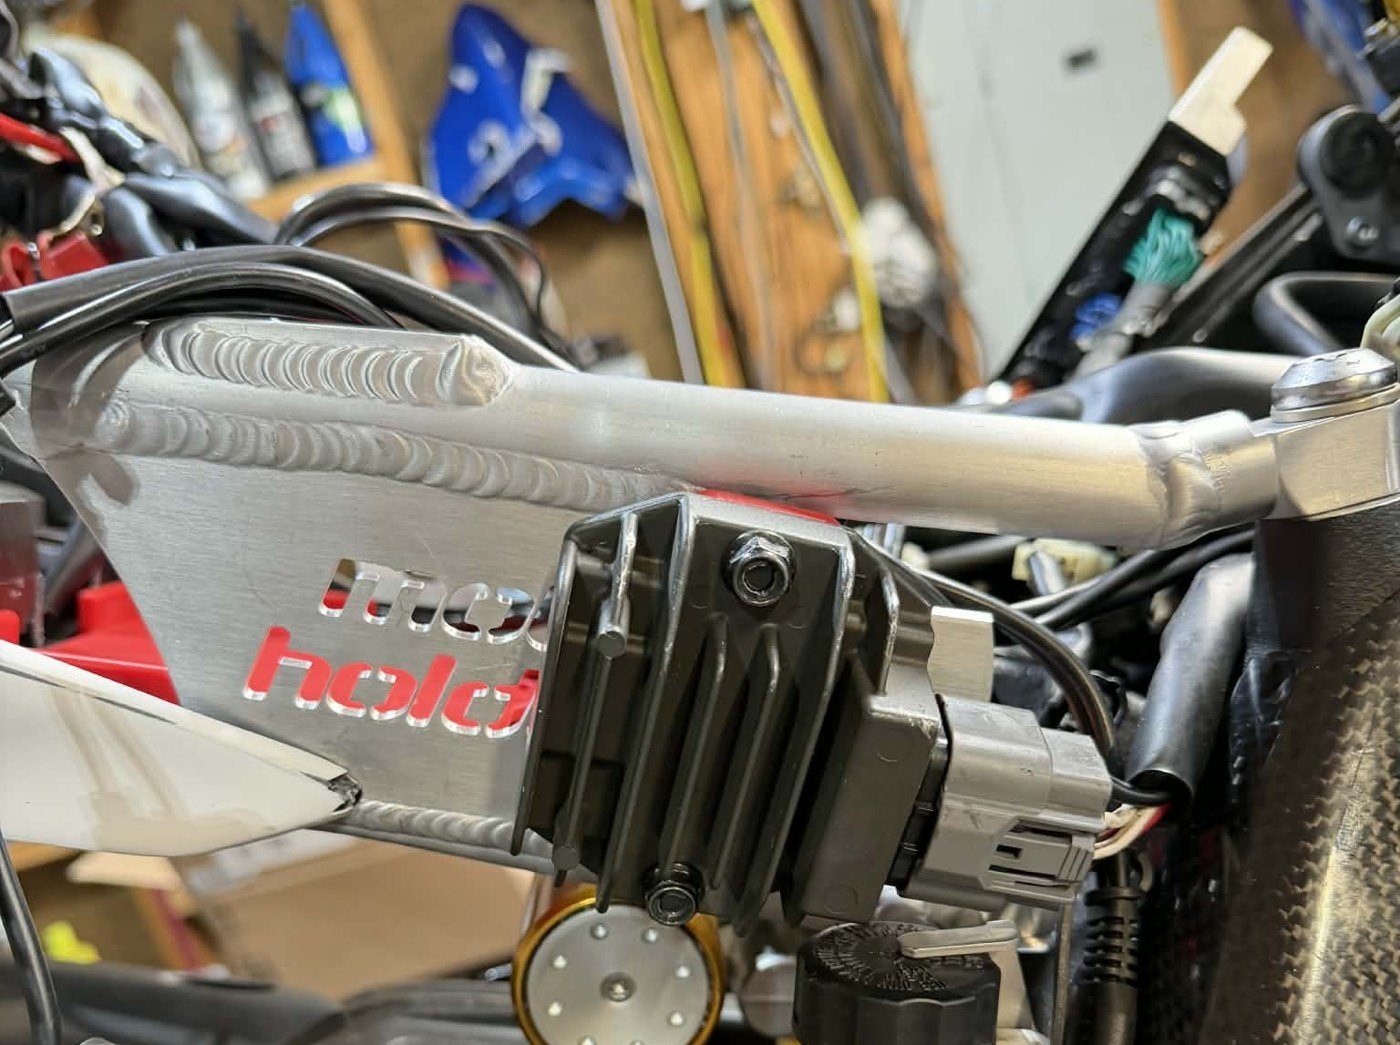
Rectifier bracket on the bike
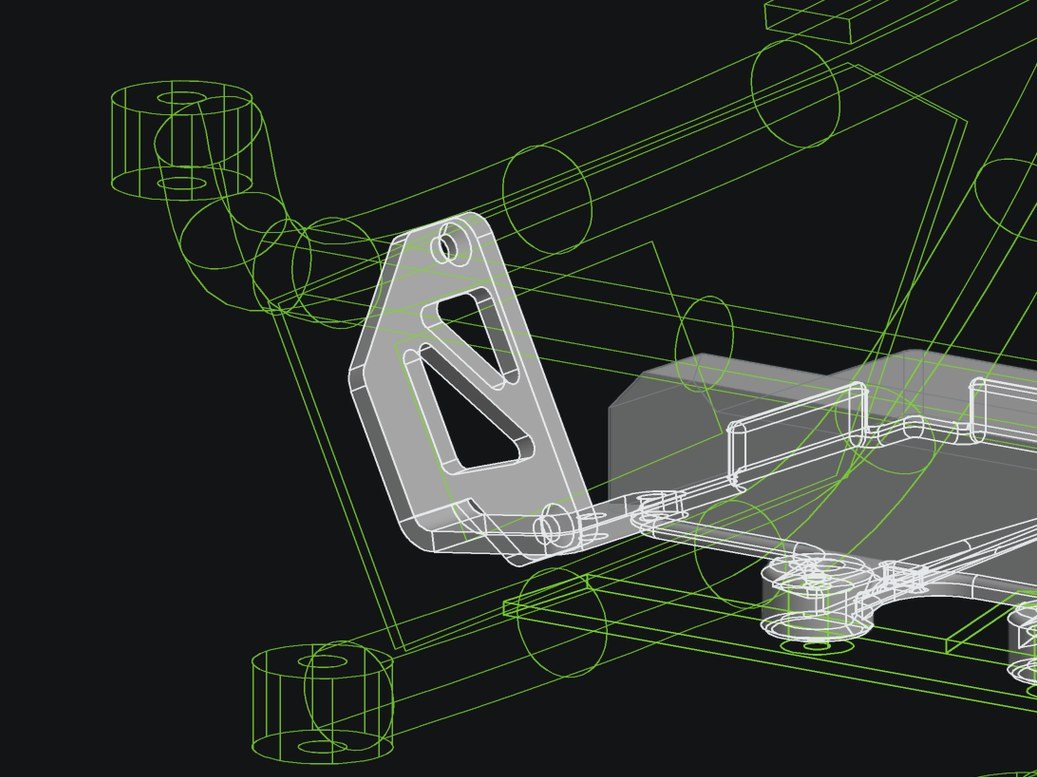
Rectifier bracket render from the production CAD
4

Rectifier bracket

RevA

Mounts flat to the inside of the right side plate. The rectifier bolts on the outside, where it gets air and stays clear of the tail.

  • ✓Aluminum sheet, 0.125 in
  • ✓One bend, bolts through the side plate
  • ✓Printed fit check before cutting
View the drawing (PDF) →
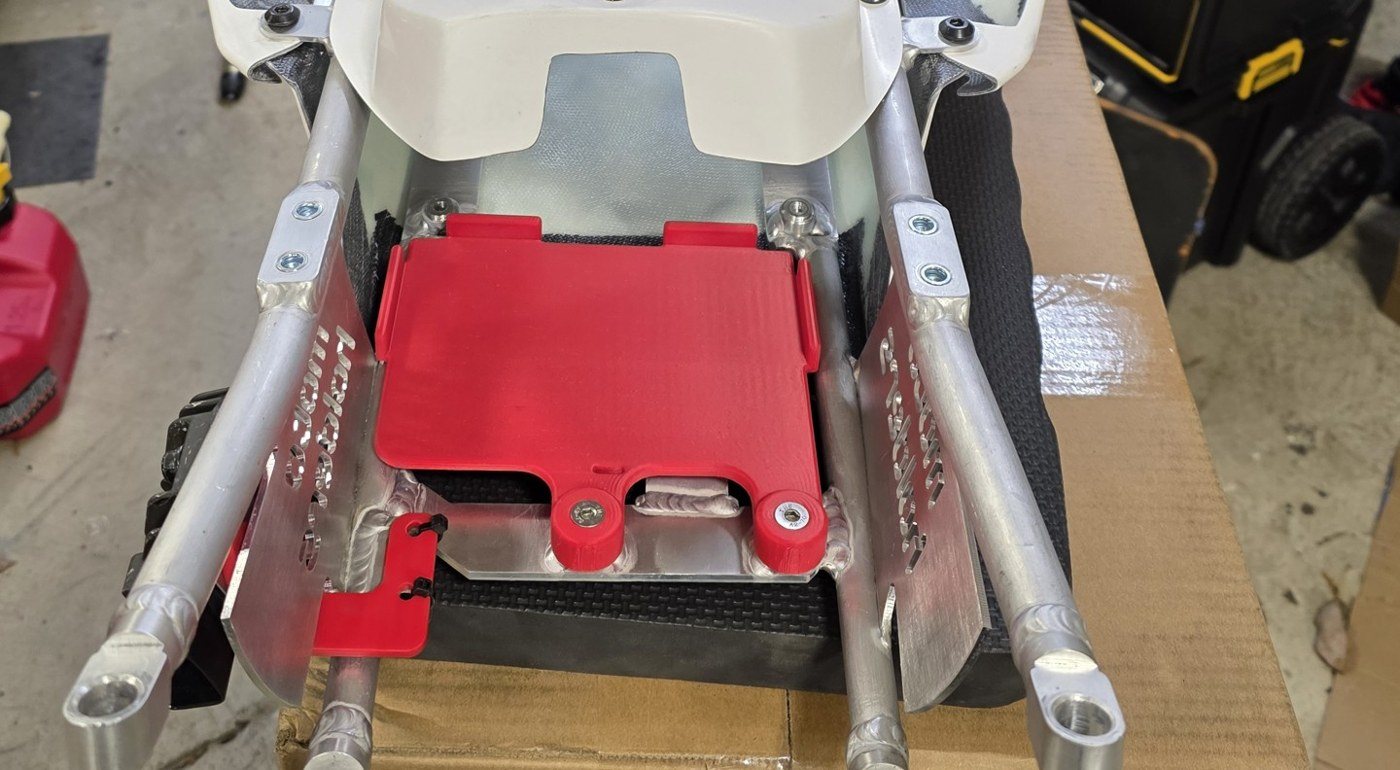
ECU tray on the bike
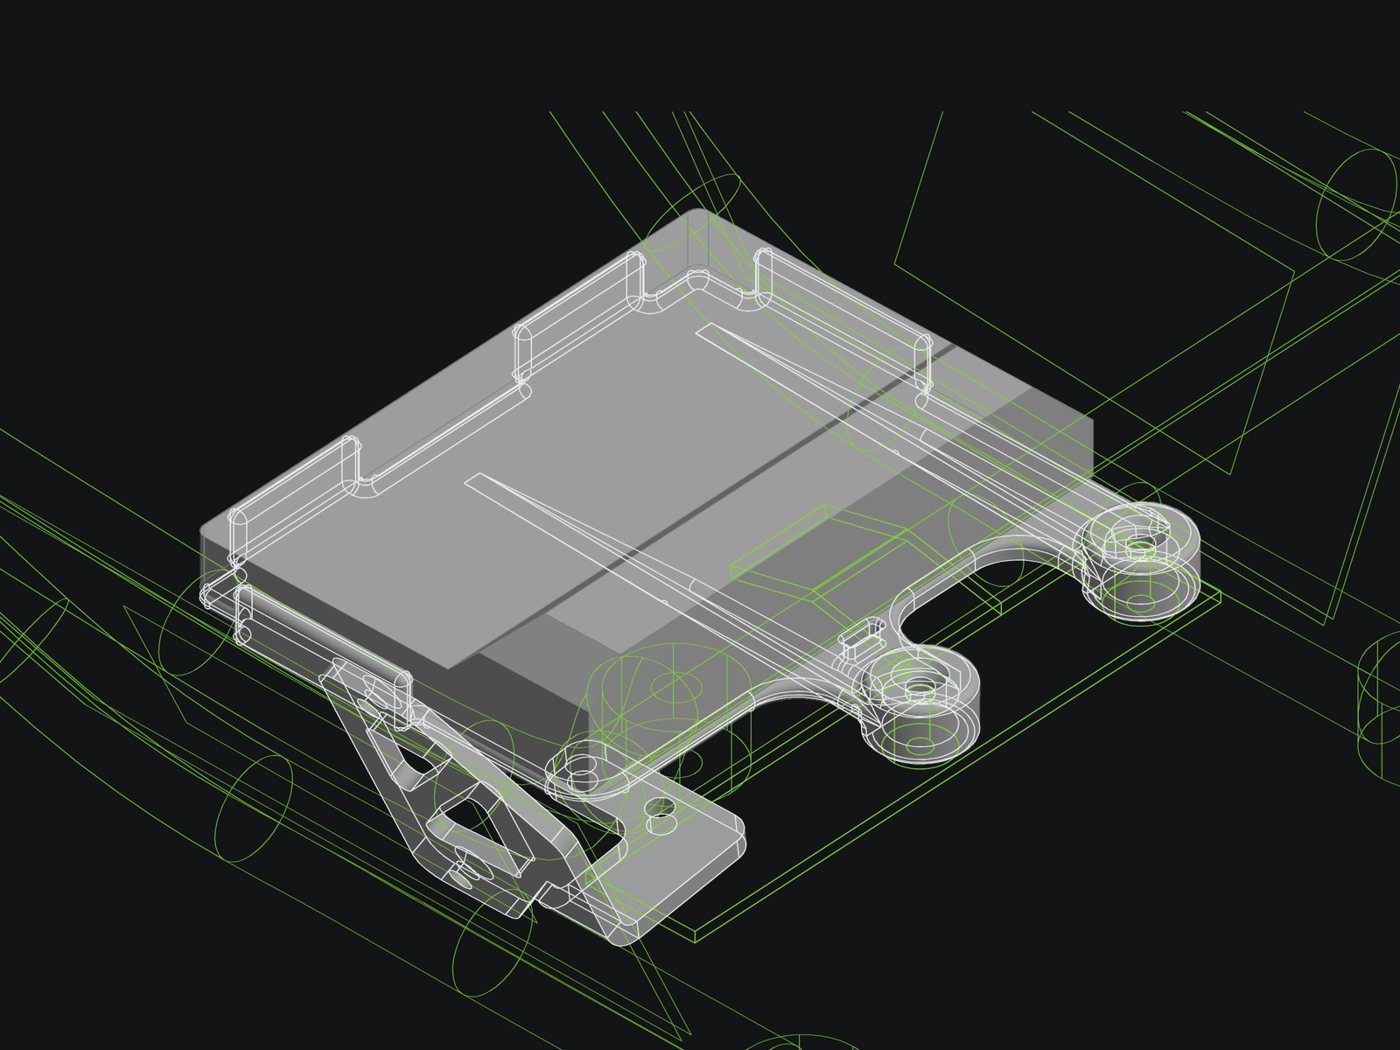
ECU tray render from the production CAD
5

ECU tray

Printed

Printed tray on the plate across the bottom rails. Its round bosses sit on the frame's welded bosses for location, then two flat head screws hold it down.

  • ✓3D printed
  • ✓Locates on the frame's welded bosses
  • ✓2x flat head screws, McMaster 92125A239
Process

Model to install

  1. 01

    Model

    Frame area and bodywork interfaces modeled in Inventor around the subframe and the Carbonin tail.

  2. 02

    Flat pattern

    Drawings with bend callouts and DXF flat patterns for the sheet metal parts.

  3. 03

    Cut and form

    Aluminum blanks cut from the DXFs and bent to the drawing.

  4. 04

    Test fit

    Printed versions first wherever the fit was tight, before any metal was cut.

  5. 05

    Install

    Bolted on the bike, then checked bodywork fit and harness routing.

Assembly

Parts list

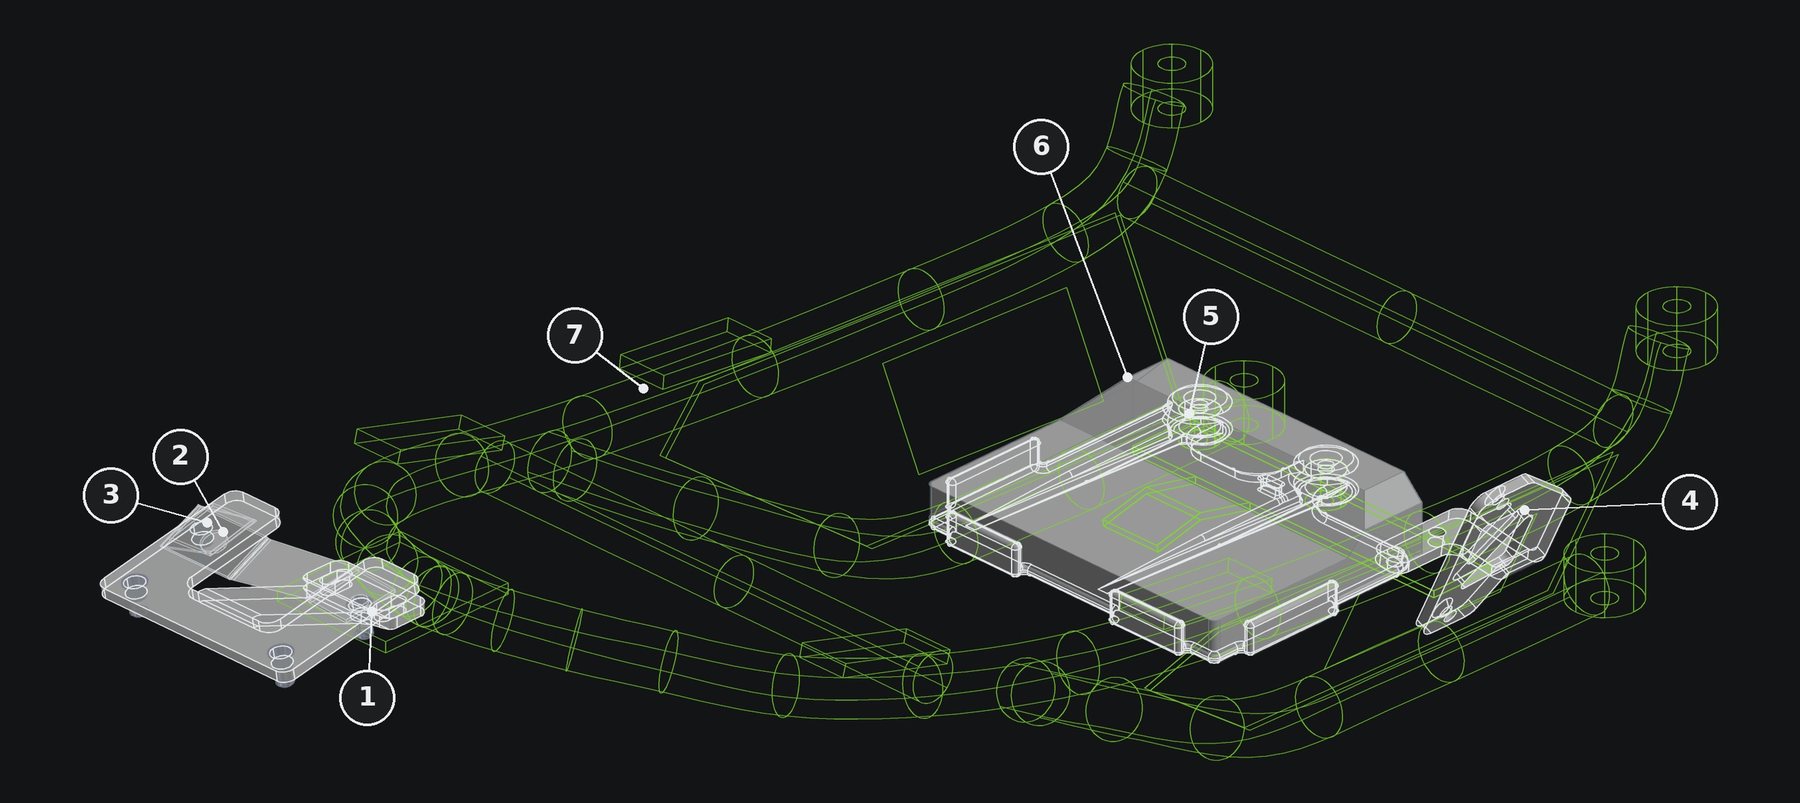
Assembly view of the R1 tail bracket set with item balloons
Bracket geometry from the production CAD. Subframe is a reference mock-up from photos, not a measured model.
ItemDescriptionMaterialQty
1Tail extension, RevAKBDAluminum sheet, 0.125 in1
2Carbonin rear seat bracketPurchased1
3Rivet nut, McMaster 95105A179Zinc-plated steel4
4Rectifier bracket, RevAKBDAluminum sheet, 0.125 in1
5ECU trayKBD3D printed1
6Flat head screw, McMaster 92125A23918-8 stainless2
7ECUYamaha OEM1
8Moto Holders race subframeReference-
Real parts

On the bench and on the bike

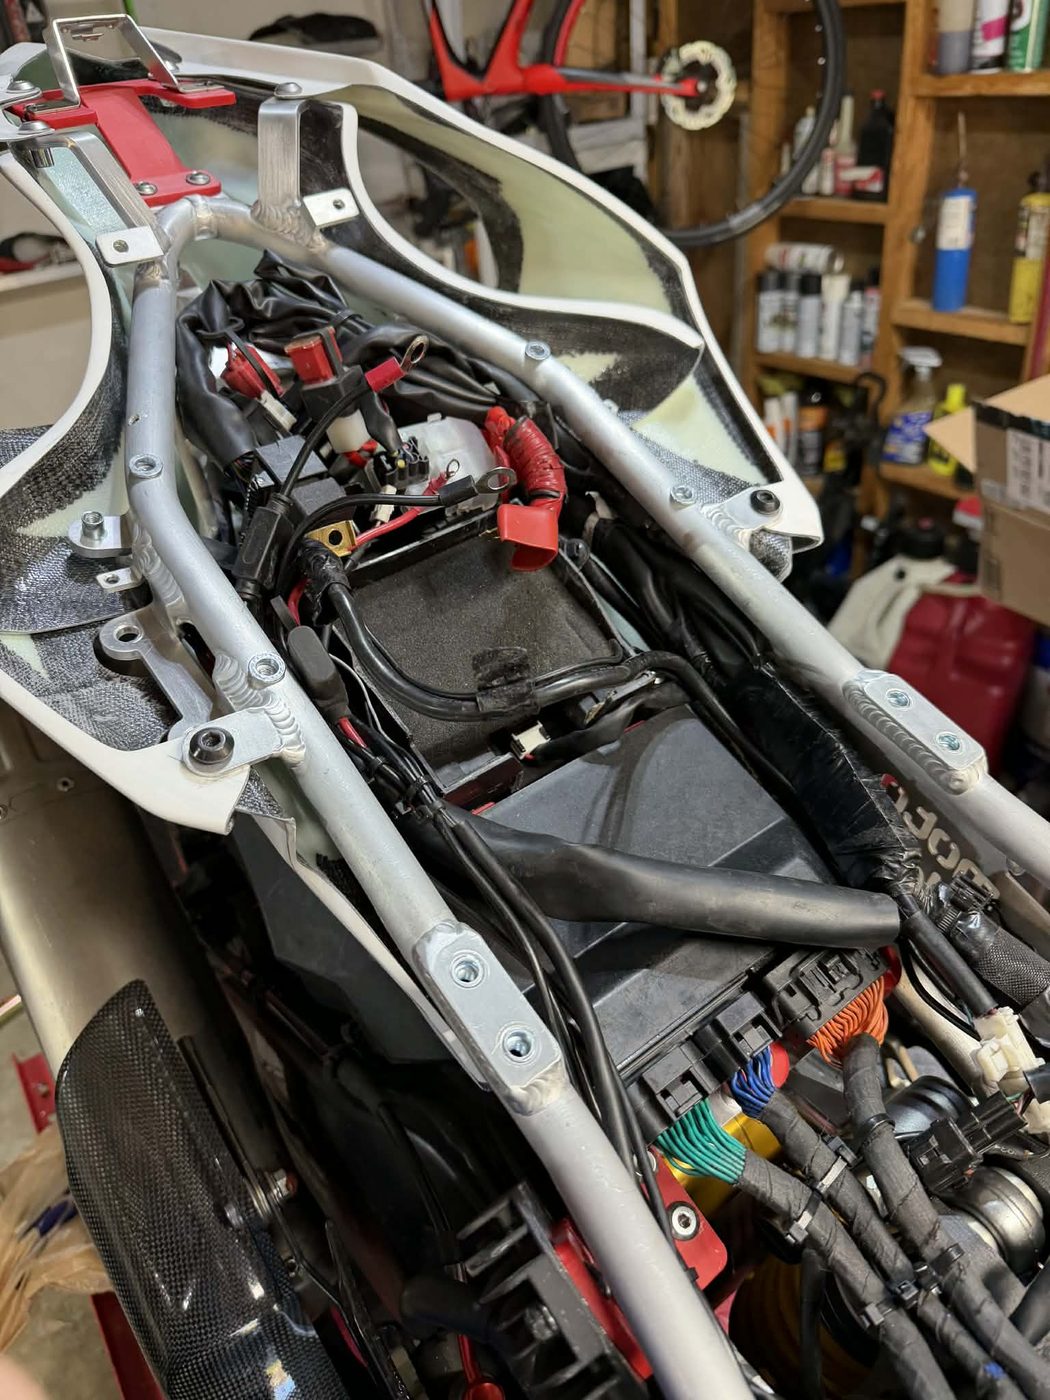
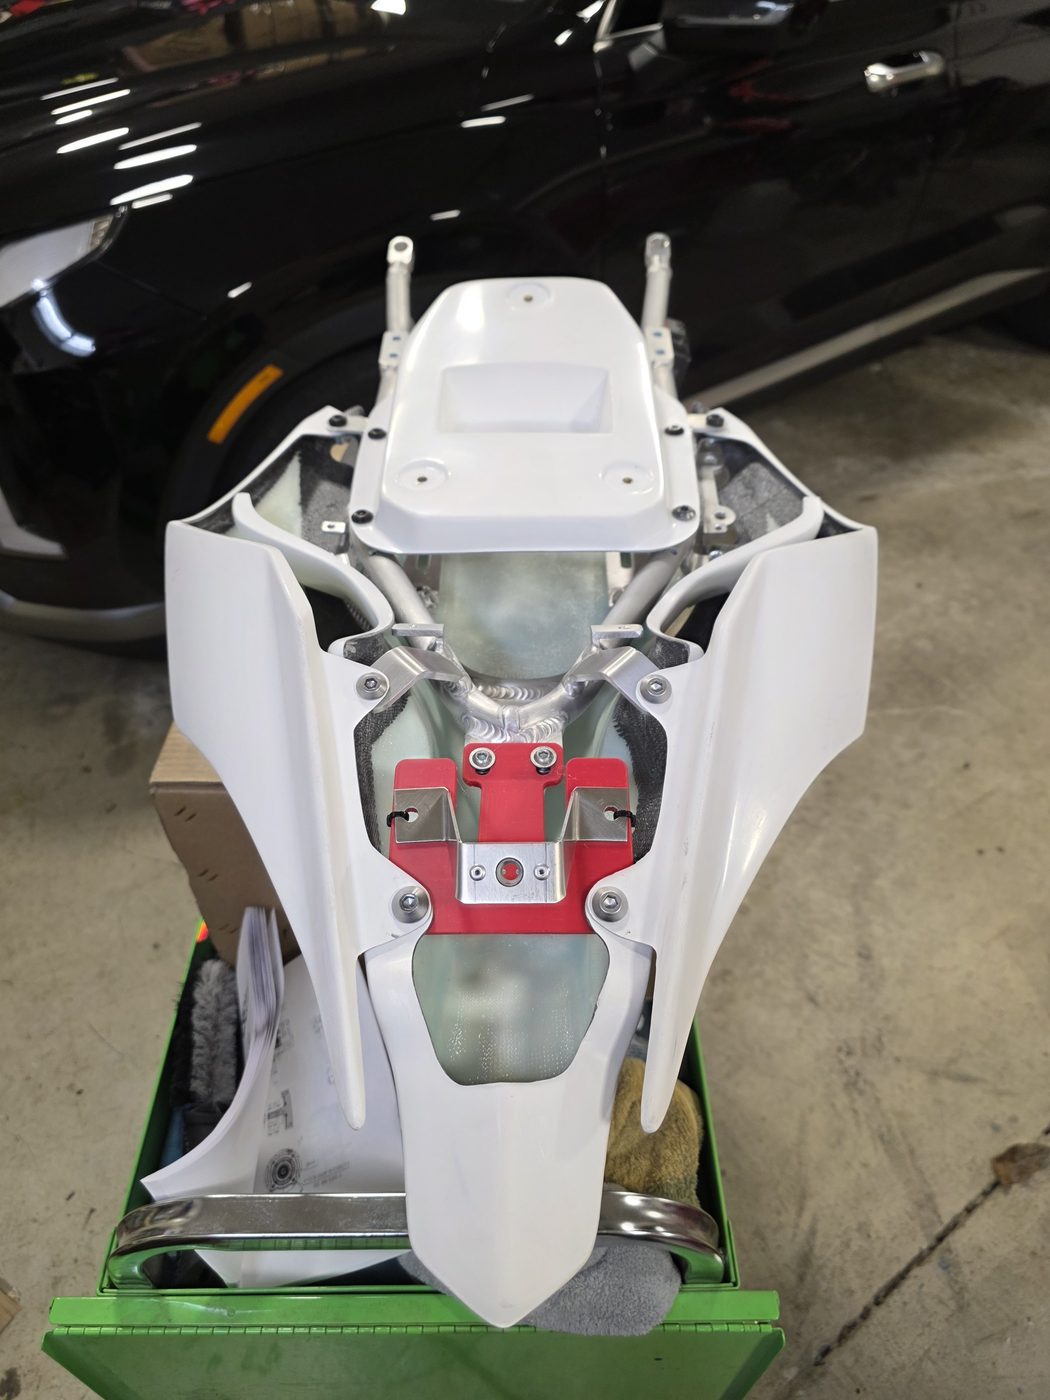
On the bike with the seat off
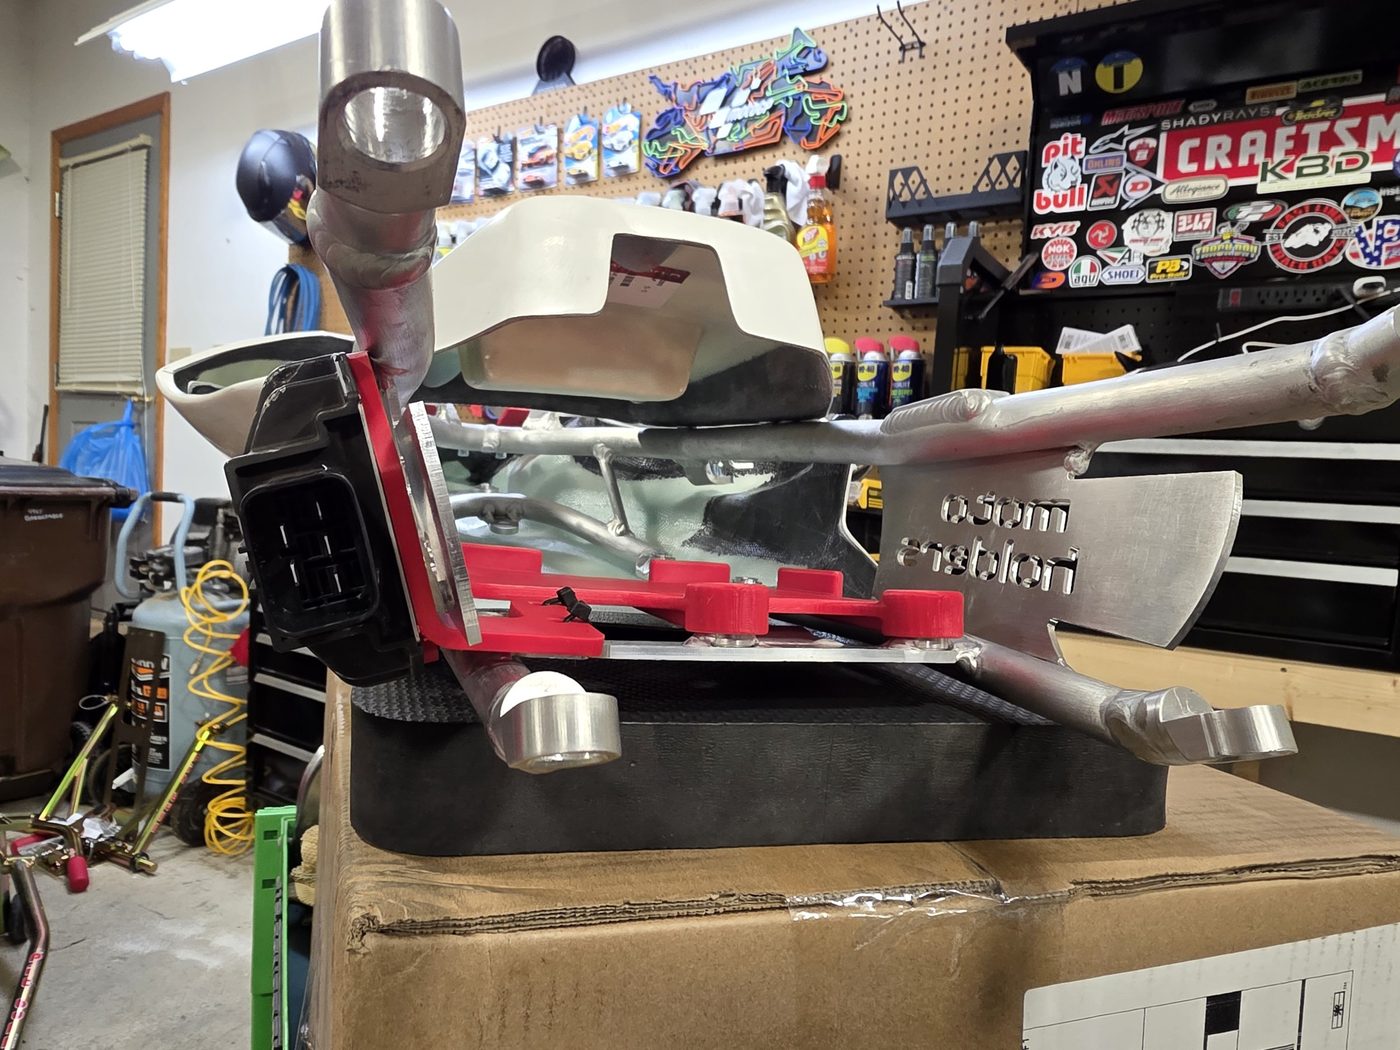
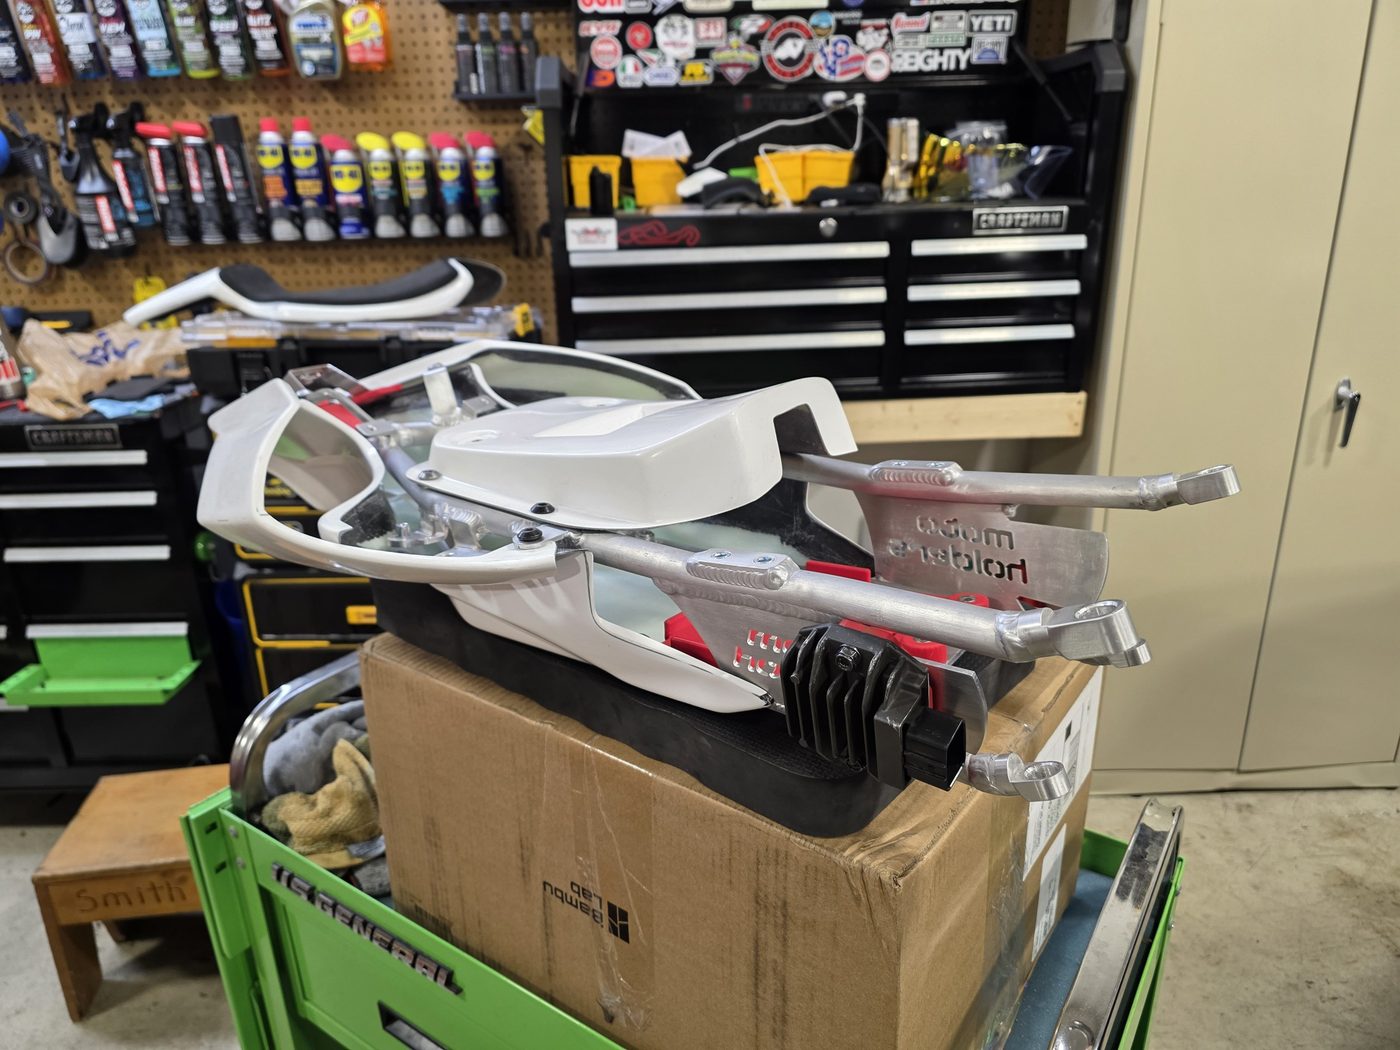
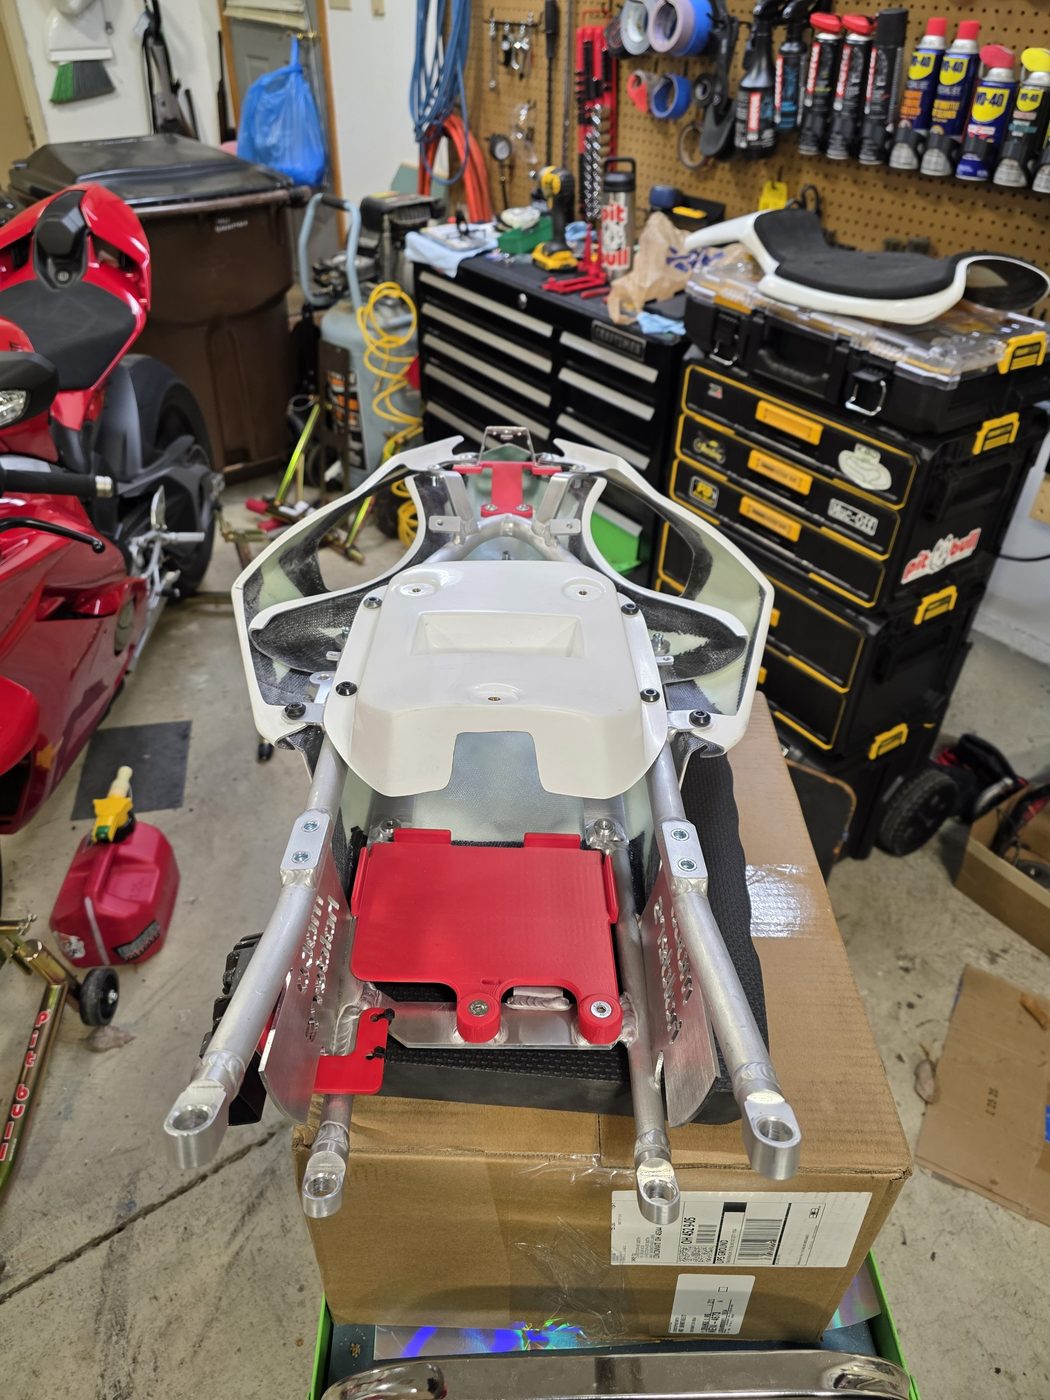
Bench fit: rectifier bracket, ECU tray and tail on the subframe
Bench fit from the other side, tail section on
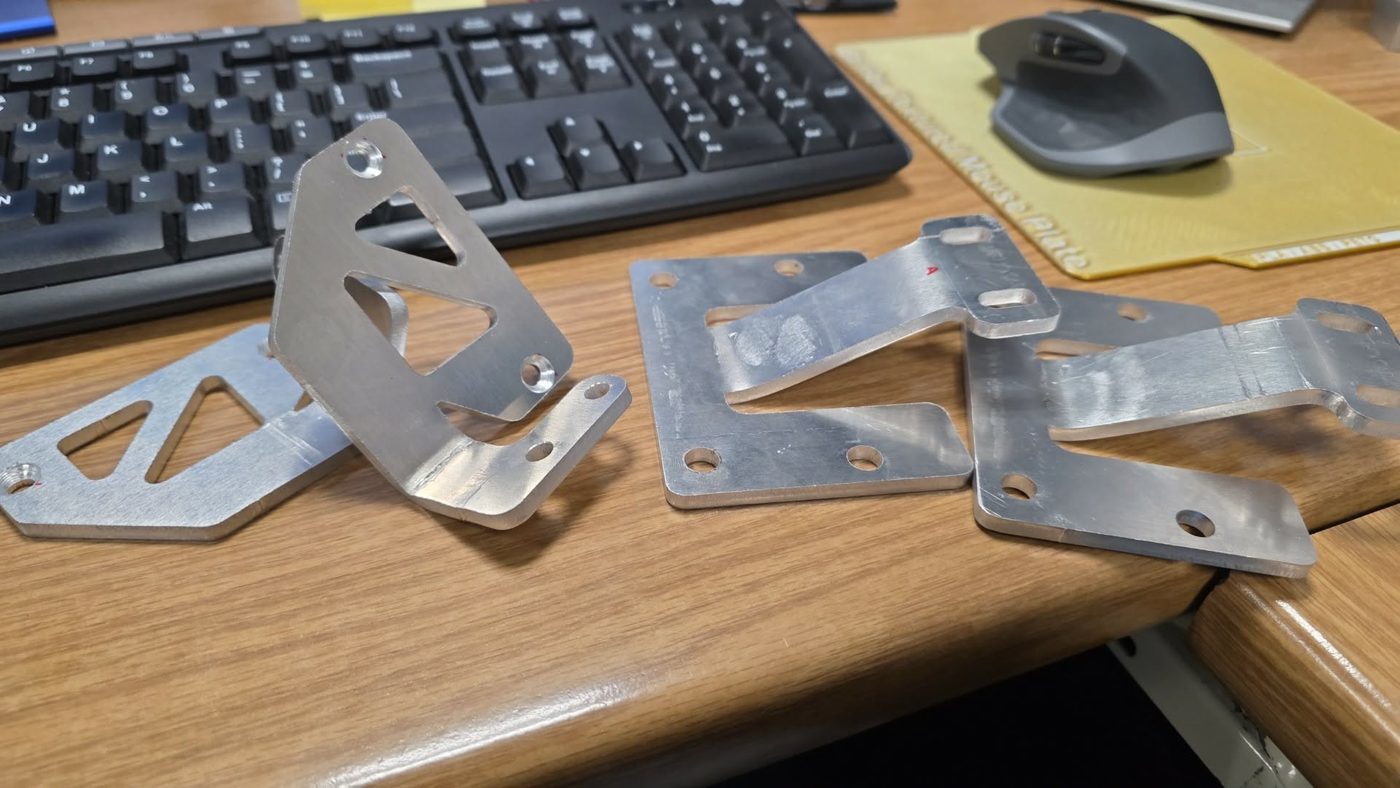
Cut and formed aluminum brackets before install
Tail extension and seat bracket inside the Carbonin tail
Top of the subframe, ECU plate between the bottom rails
Your build

What this means for your project

For racers

Brackets, mounts and packaging that fit the first time.

Race subframe, new bodywork, a data logger or a dash that needs a home. Send photos and tell me what you need to mount. I model it around your bike, fit check a print, then make the part. Built by a club racer who has to take it apart in the pits too.

For shops and OEMs

The same process, for your product.

Sheet metal design, flat patterns and drawing packages your vendor can quote, DFM review, and printed fit-check prototypes before you cut metal. Small runs of race and aftermarket brackets welcome.

Building a race bike?

Send me photos and what you are trying to mount. I review every request myself and reply within 2 business days.

Start a race project→