A better grip on the torch.
Two parts, two sizes.
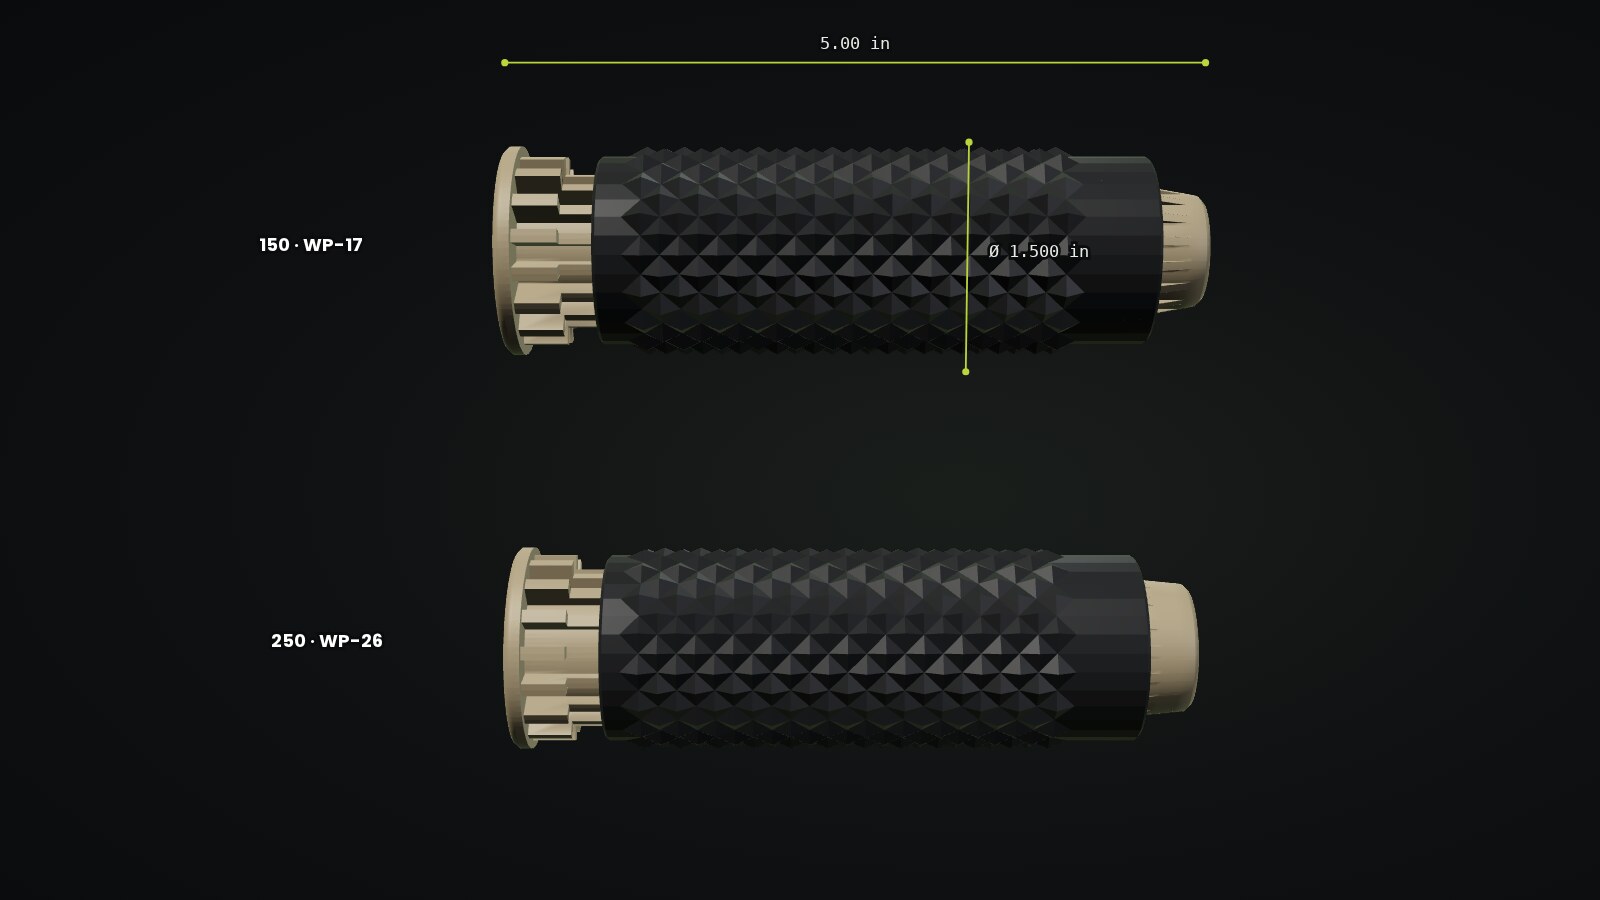
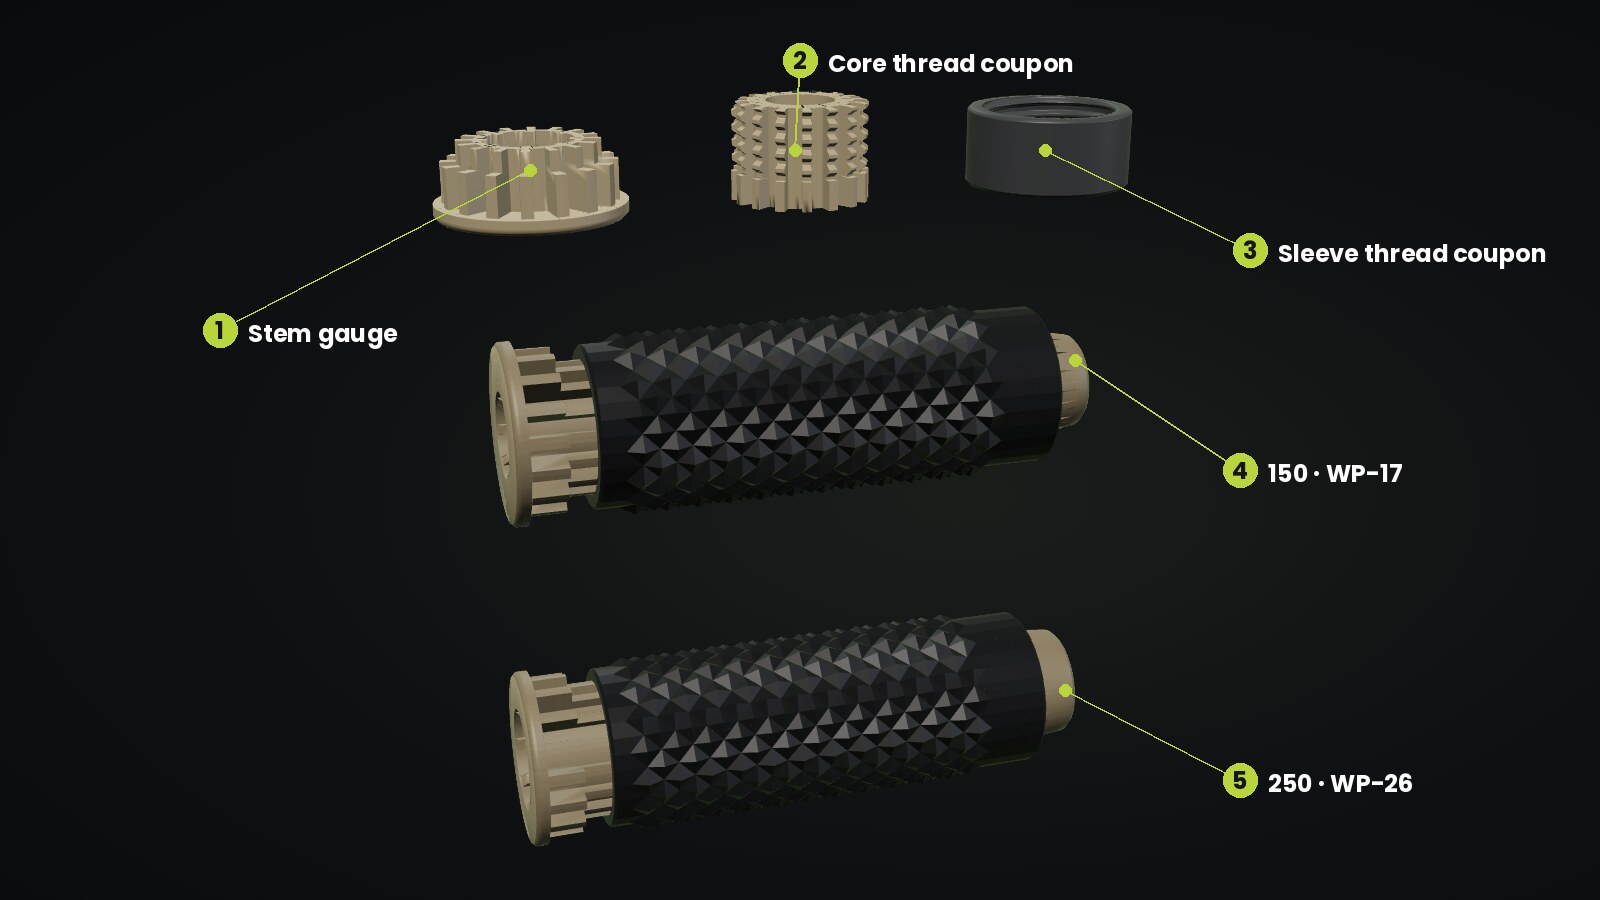
A printed handle for WP-17 and WP-26 TIG torches. A ducted core slides onto the torch and a diamond-knurl grip sleeve threads onto it. Grooves in the core become 16 air ducts once the sleeve is on. Fit-check coupons print first, and the whole thing ships as a print pack with instructions.
- Torches
- WP-17 (150) and WP-26 (250)
- Length
- 5.00 in
- Grip
- 1.500 in over the diamond knurl
- Parts
- Core plus a threaded grip sleeve
- Cooling
- 16 air ducts, head to tail
- Status
- Prototype P1, print pack released
Why the handle exists
The challenge
Make one handle design that fits both WP-17 and WP-26 torches, is sized for a gloved hand, and lets air move through it instead of trapping heat around the grip.
What I did
Split the handle into two parts: a core that slides onto the torch and a grip sleeve that threads onto it. Grooves in the core turn into air ducts once the sleeve is on. One design, two cores, sized for the WP-17 and the WP-26.
The result
Prototype P1 with a full print pack and instructions. Fit-check coupons come first so a bad fit costs a few grams of filament, not a full handle.
Three features that do the work
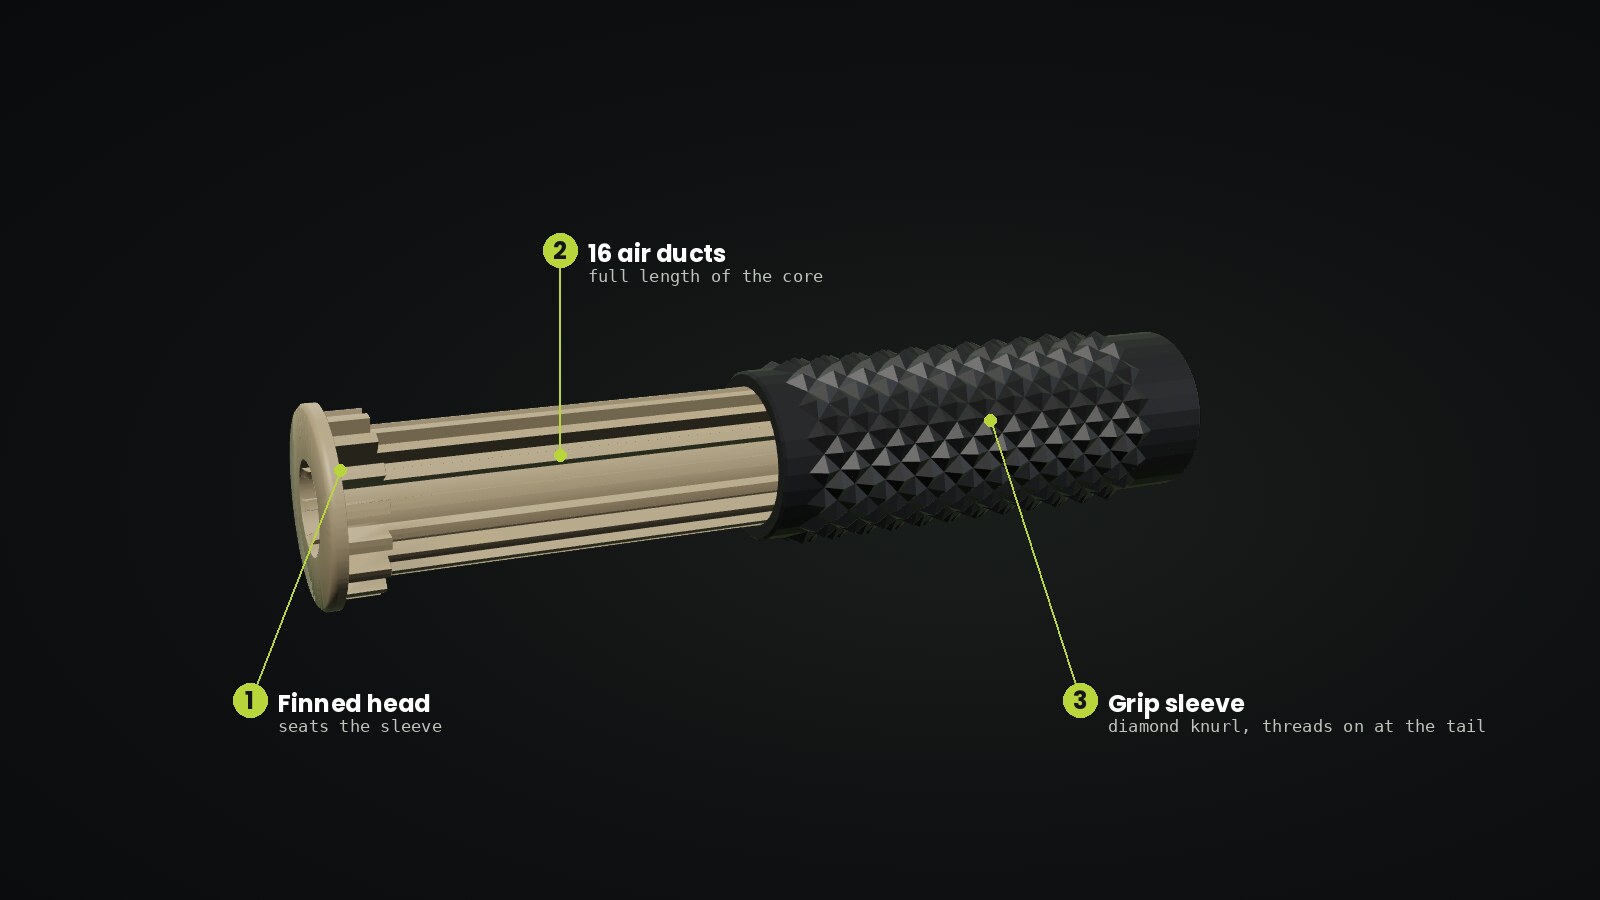
Finned head
The flange at the torch end is the stop for the sleeve. The fins behind it leave windows open so air can get into the ducts.
16 air ducts
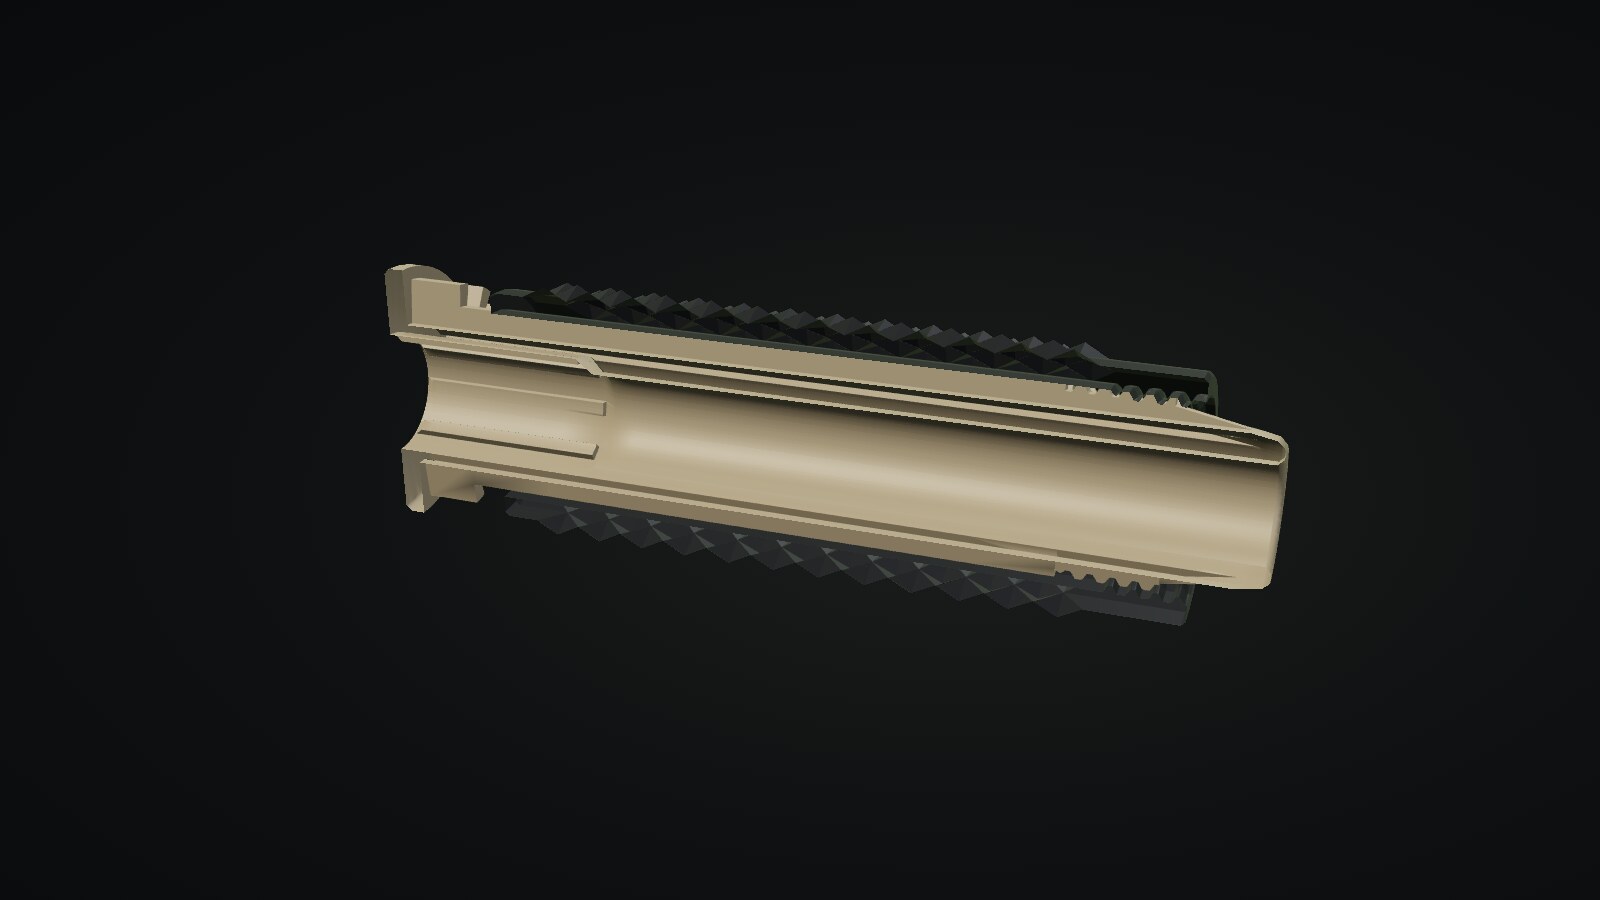
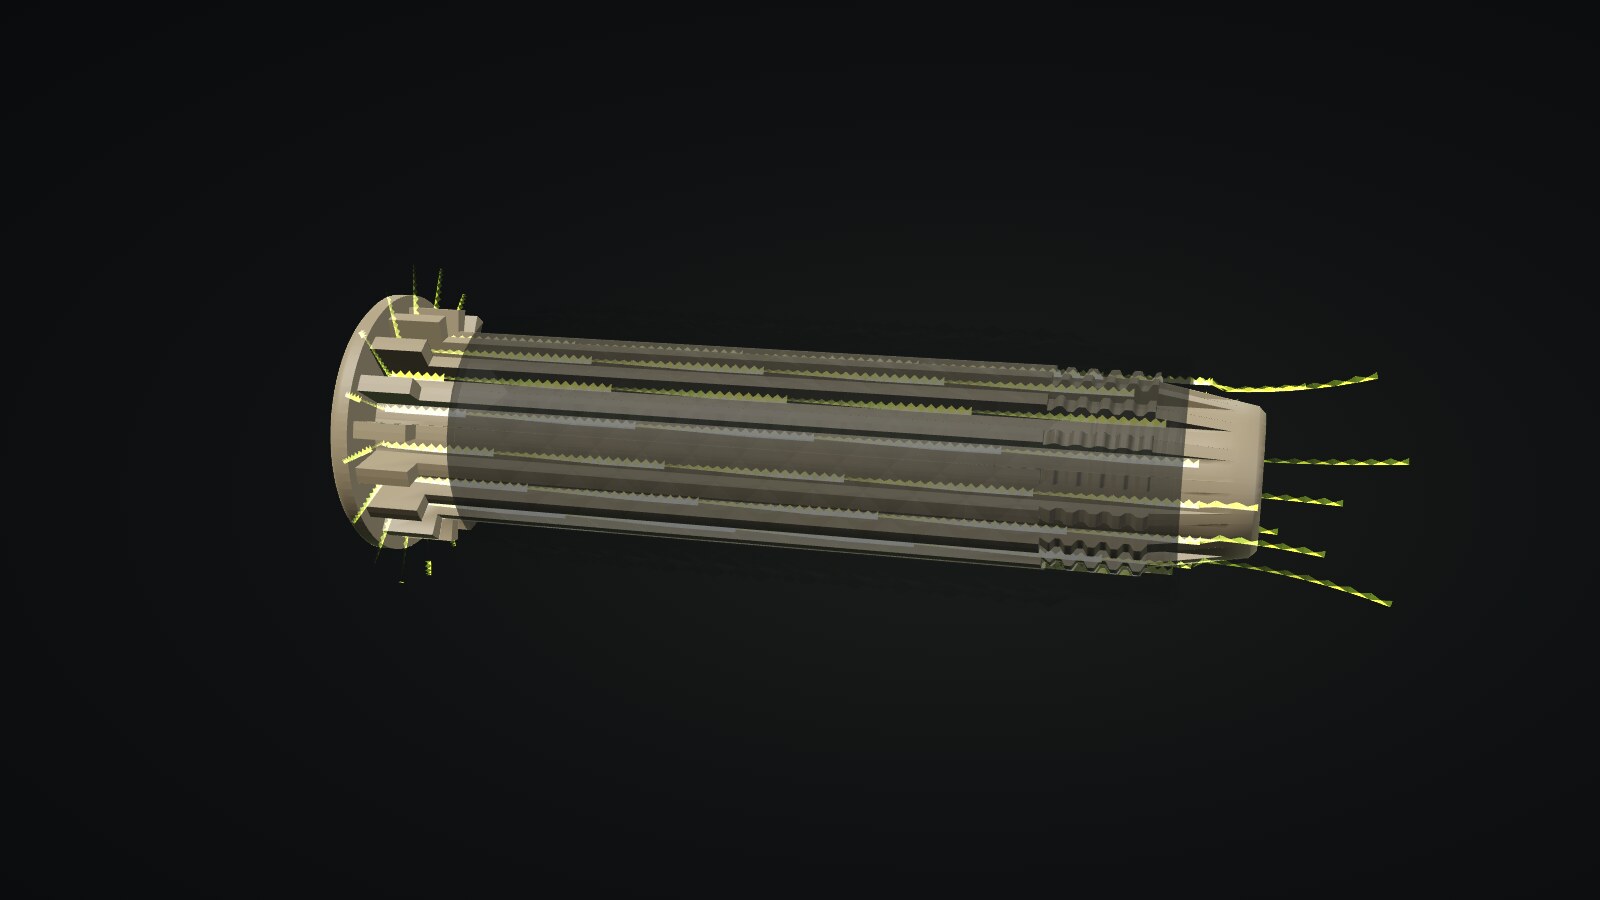
Grooves run the full length of the core. With the sleeve on, they close into ducts that carry air from the windows at the head out the tail.
Threaded grip sleeve
The diamond-knurl sleeve slides on from the cable end and threads onto the tail of the core until it seats against the finned head.
Where the air goes
One design, two torches
Small prints first, then the part
- 01
Measure
Torch stem and head measured for both sizes, WP-17 and WP-26, so each core slides on with a snug fit.
- 02
Model
Core and sleeve modeled as a pair: finned head, ducted body, threaded tail, and a knurled sleeve sized for a gloved hand.
- 03
Coupons
A stem gauge and two thread coupons print first. They check the fit on the torch and the thread engagement in minutes, not hours.
- 04
Fit check
Only after the coupons pass do the full core and sleeve print, then go on the torch for the fit checks.
- 05
Release
Print pack: build plates, individual STLs, STEP files and assembly instructions for both sizes.
What this means for your project
Grips, handles and adapters that fit the tools you already own.
Tell me the tool and what bugs you about it. I measure, model the part around it, and send fit-check coupons before the full print so the fit is right the first time.
From idea to a print pack you can hand off.
Multi-part designs built for printing, size variants from one model, test coupons, and a release package with plates, STLs, STEP files and instructions.
Got a tool that needs a better handle?
Send me photos and what you want it to do. I review every request myself and reply within 2 business days.
Start a product project→